
Using Indus CP/M
System disk
There is a problem with the disk. The images of system diskettes are in the ATR format, which forces the first three sectors to be 128 bytes long. The original diskettes had 256 bytes in each of them. The second halves of sectors 1-3 were lost during coping. Fortunately, the missing data belongs to hardware-independent modules of the CP/M system. I have successfully restored them, basing on other distributions of CP/M. Additionally it turned out, that the first sector didn't need any changes. There is still a problem how to put the missing data into the sectors 2 and 3, since Atari expects just 128 bytes in them.
The solution is the Indus CP/M Tool, which fills the missing parts of the boot sectors, using programmability features of Indus/LDW//CA drives. One should start with fixing the Indus RAM Charger Utility Disk (the other Indus CP/M system disks contain an older BIOS). The procedure is as follows:
- Make a diskette of Indus RAM Charger Utility Disk using any regular Atari copier (double density)
- Run Indus CP/M Tool
- Choose Fix CP/M boot
- Insert the diskette to fix and confirm.
- Use the diskette to boot CP/M (see below).
If you succesfully booted CP/M you can create a new system disk with CP/M's INIT program.
An alternative approach (the initial one described once on this page) requires a PC running MS-DOS with a 5,25 360kB drive. Using Anadisk software (version 2.06 worked for me), fill the missing parts of sectors 2 and 3 with data from this dump (leave sector 1 intact).
Booting Indus CP/M
- Make a diskette of Indus RAM Charger 40/80 Col. Terminal - this is a regular DOS XL disk, so it doesn't need to be fixed
- Boot your Atari with the terminal diskette in the drive
- After the DOS is loaded, run 80-column terminal with E.COM or 40-column one (F.COM)
- Insert the CP/M system diskette into the drive
- While holding the Drive type button, press Error
- A message of Indus CP/M and a request for pressing Return appear on the screen. If nothing happens, the memory extension is probably faulty or the system disk is not fixed.
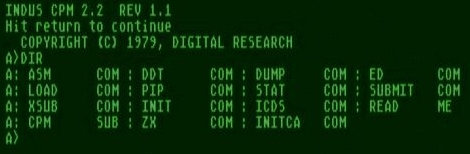
- After pressing Return, the CP/M command prompt should appear (A>)
- Now, we can issue DIR to obtain a list of files on the disk:
Indus CP/M manual
There is a READ.ME file on the system disk, containing the description of Indus CP/M. The contents of the READ.ME file can be seen by issuing TYPE READ.ME or clicking below:
- INDUS CPM 2.2 (they refer to terminal programs TRM80 and TRM40, however they have names of E and F, as mentioned above).
It is no general CP/M manual, but you can find one here (version 2.2 is appropriate).
CP/M works best with two or more disk drives. So it is convenient to use as D2: either a second drive or a SIO2PC device.
Terminal emulation
Many CP/M programs require setting the terminal model for proper screen handling. In our case, we should choose the ADM-3A (Lear-Siegler) for 80-column mode and ADM-31 for 40-column, since these models of terminals are emulated by E and F programs (they say about TRM80 and TRM40 programs in the document, but this is apparently a mistake).
TT - Trub Terminal
TT is an enhanced 80-column terminal program using VideoBoardXE text mode (if available). TT requires a screen driver (S_VBXE.SYS or RC_GR8.SYS) from SpartaDOS X Toolkit.Download TT - Trub Terminal 0.6
How to get ASCII characters that are not present on Atari keyboard:
| Character | Key |
|---|---|
| { | SHIFT < |
| } | SHIFT > |
| ` | Inverse |
| ~ | SHIFT Inverse |
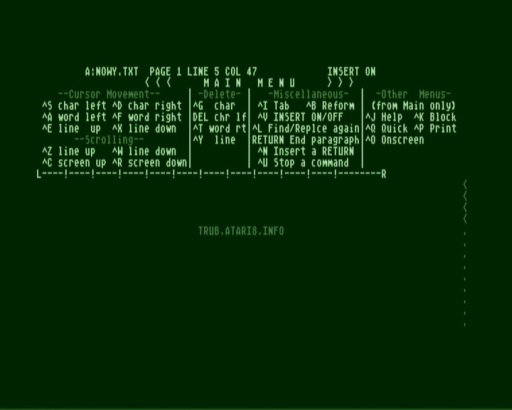
Wordstar on TT VBXE terminal screen
CP/M software
Programs for CP/M can be easily found in the Internet. However, it can be hard for beginners to copy them on a diskette and to run. Here is a possible way to create a new CP/M disk and to store the files on it:
- Boot CP/M and keep the system disk in the drive
- Mount Indus RAM Charger Utility Disk as D2: (using either SIO2PC-like software or a second drive)
- Run INIT program from drive B: (B:INIT)
- Insert an empty diskette into the CP/M drive, when prompted
- Use INIT program to format the diskette and to store the system on it
- Create an ATR image on the PC-side (AtariDOS or MyDOS format, 180kB), containg files to be copied to the CP/M
- Under CP/M, run ICDS from B: (B:ICDS)
- Mount the created ATR as D2:
- Use "C" option of ICDS to copy the files, giving 2: as the target device and A: as the source (ex. 2:*.COM,A:)
- Now you can execute the copied files.
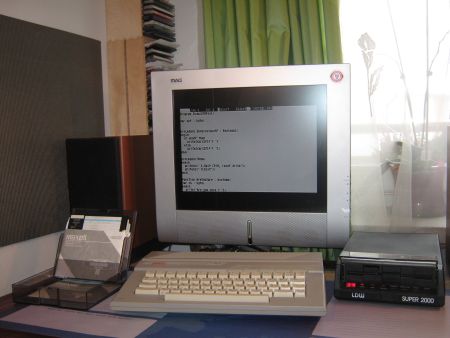
Indus CP/M system running on the LDW drive